Knots - are an extremely important part of climbing and mountaineering. No climber could be complete or safe without some basic knowledge of knots. On this page, I will show you what I believe to be some of the most important knots that you need to be familiar with.
 Knot tying is certanly a necessary skill for keeping safe when doing any type of serious climbing, and there are multitudes of knots that can be tied. I have to say, that if you knew them all, you would be not only be all set for climbing, but you would no doubt be able to tie off a clipper ship.
I have found that the knots shown on this page have been sufficient for me to get along quite well over the years on the many mountain climbing adventures that I have had the privilege of going on.
Knot tying is certanly a necessary skill for keeping safe when doing any type of serious climbing, and there are multitudes of knots that can be tied. I have to say, that if you knew them all, you would be not only be all set for climbing, but you would no doubt be able to tie off a clipper ship.
I have found that the knots shown on this page have been sufficient for me to get along quite well over the years on the many mountain climbing adventures that I have had the privilege of going on.
Now if you would like to advance even further in the art of knot tying, there are many good books, and other websites that specialize in knots, and you may want to explore them on your own if you feel so inclined. However, as mentioned above, the knots below I believe will give you a good start in the skill of knot tying.
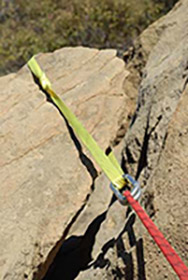
The uses of the humble webbing seem to be endless. But in order to do any of the above, the webbing must be configured into a loop, and that requires tying the two ends together. Here is where the "Waterman Knot" comes into play. It is the perfect knot for tying those ends together. The two colors of webbing shown below are for illustrative purposes only.
You can also use the waterman knot to extend the length of a piece of webbing by tying another piece of webbing to it (the length is only limited by the amount of webbing you have on hand). But for the most part, climbers use a 5 or 6 foot piece of webbing and tie the two ends together to make a loop. This seems to be somewhat of a standard length of webbing in mountaineering. Tied off loops of webbing are so important that most climbers carry several of these pre-configured loops on every climb they go on. Webbing can be used for aid, runners, protection, and for a multitude of other uses out there.
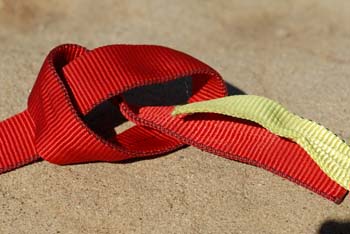 #1 - To start the knot, make a simple overhand knot configuration as shown with the red webbing. Then begin to lay the other end of the webbing directly on top of the end portion of the other end as shown in the red.
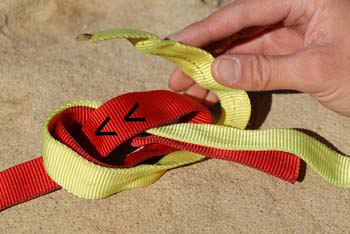 #2 - Next, continue to lay the yellow webbing directly on top of the red webbing following it exactly around in the opposite direction as shown in the second image above.
 #3 - Now feed the yellow end under the bridge of webbing where the small black arrows displayed in the image above.
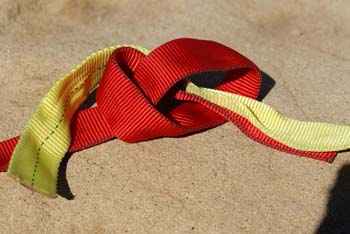
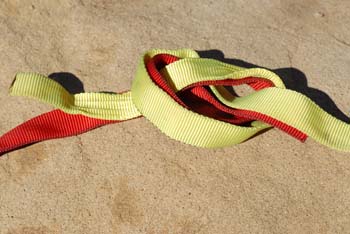 #4 - Nearly done. All you need to do is to pull the two ends tight, and you will have a first class "Waterman Knot." Make sure you have 2 or 3 inches of loose on each side for added security.
This allows the mountaineer to rappel over 150 feet and still be able to retrieve his rope. The Fisherman Knot is also used for tying narrow diameter rope together for protection purposes and also for short loops of rope that can be used to prusik up a fixed line for ascending purposes. The four step process of the Fisherman Knot is shown below.
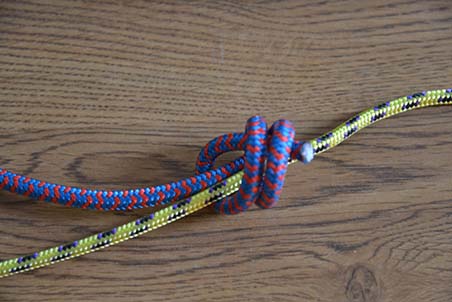
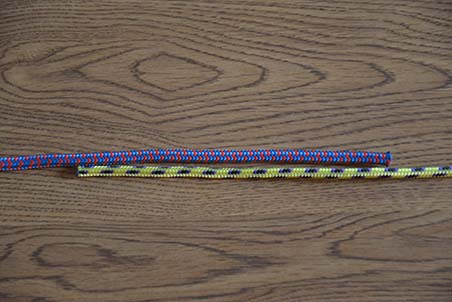 #1 - Lay the two ends of the ropes side by side as shown.
 #2 - Next, Take the loose end of the rope coming from the left and tuck it under both lines to begin your coils.
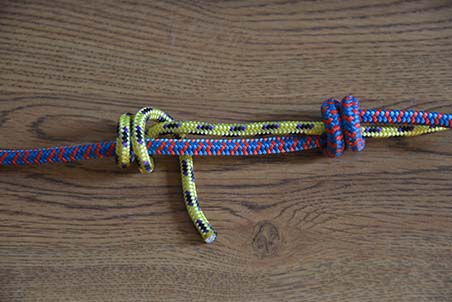
 #3 - As you can see, the purple colored rope coils around the yellow rope leading to the left. Two coils should be sufficient, but you could do three if you want to make it even more secure.
 #4 - Next, take the loose end of the purple rope and feed it back through the coils to the right.
 #5 - Then tighten up the purple rope and it should look something like the example in the image above.
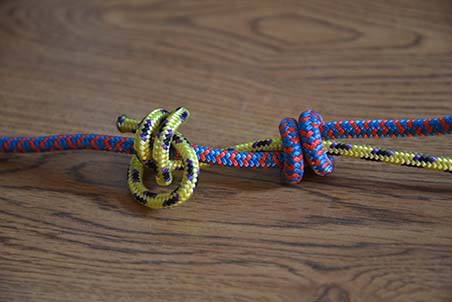 #6 - Now begin to complete the steps we just performed with the yellow rope. It will be the mirror image of the knot as shown in the photo above.
 #7 - Then feed the loose end of the yellow rope back through the coils just like we did with the purple rope.
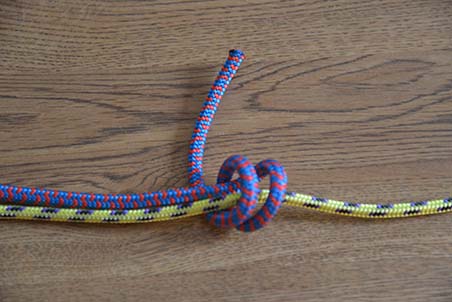
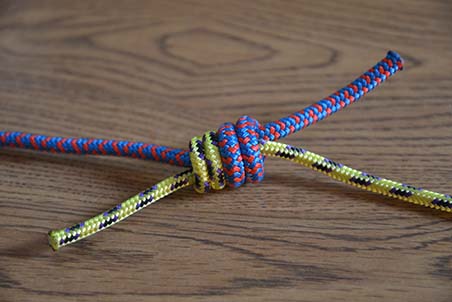 #8 - Lastly, pull it all tight and you should have something the looks like the above configuration. As mentioned above, this is a great way to tie two ropes together. The greater the load, the tighter the knots become, as they press against each other.
Double Figure Eight -
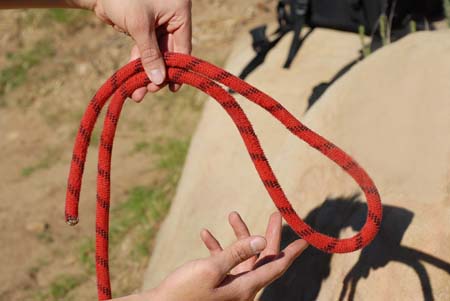
 #1 - Double back the rope and create a loose loop as shown above.
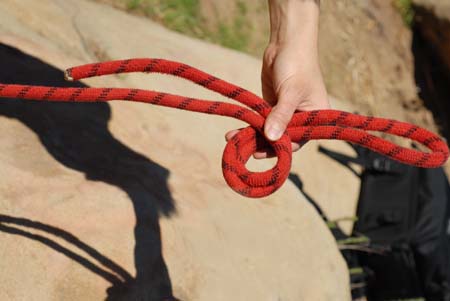
 #2 - Next, turn the doubled rope to the left, and create a circle of rope.
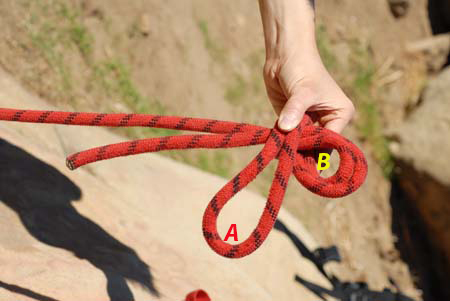
 #3 - Then take the loose loop of rope that extends to the right in figure two, and wind it over the top of the double line.
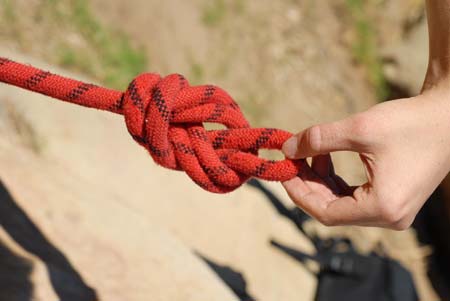
#4 - Lastly, take the larger loop (letter "A" shown in figure #2), and wind it under the small doubled coil (letter "B" figure #2) and pull it through from beneath. Finally, pull the ends tight. You should now have a configuration that looks similar to the above.
#3 - Then take the loose loop of rope that extends to the right in figure two, and wind it over the top of the double line.
#4 - Lastly, take the larger loop (letter "A" shown in figure #2), and wind it under the small doubled coil (letter "B" figure #2) and pull it through from beneath. Finally, pull the ends tight. You should now have a configuration that looks similar to the above.
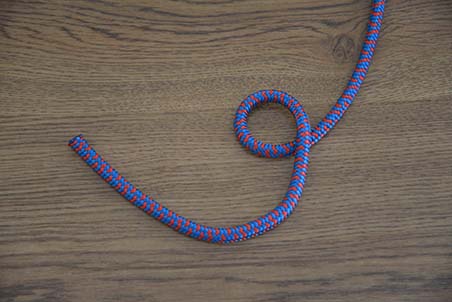 #1 - Start off laying the rope over itself to form a loop by going "around the pole"
 #2 - Next, take the end of the rope and go up 'through the hole"
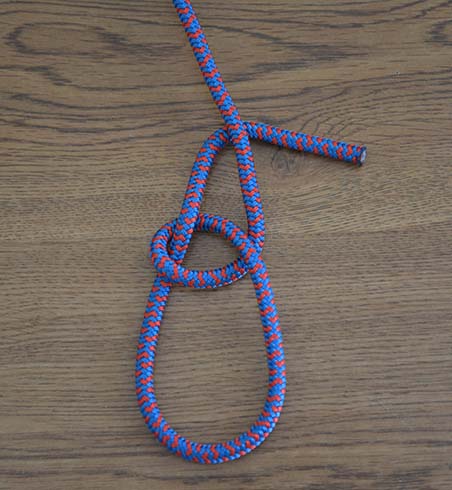 #3 - Next, take the loose end and go underneath the long end of the rope for "around the pole" once more.
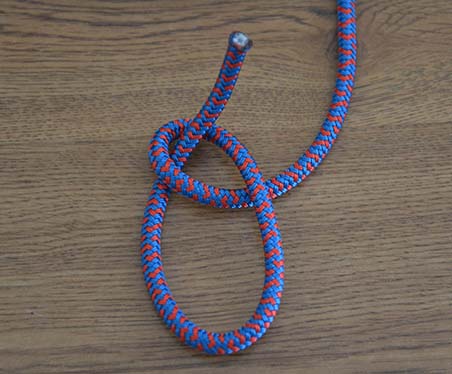
 #4 - Then, take the loose end of the rope once more and go "back down the hole."
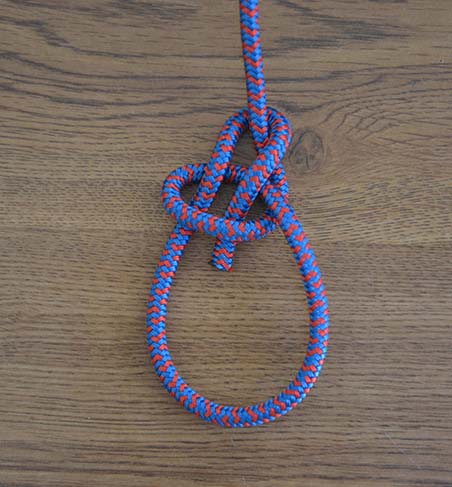
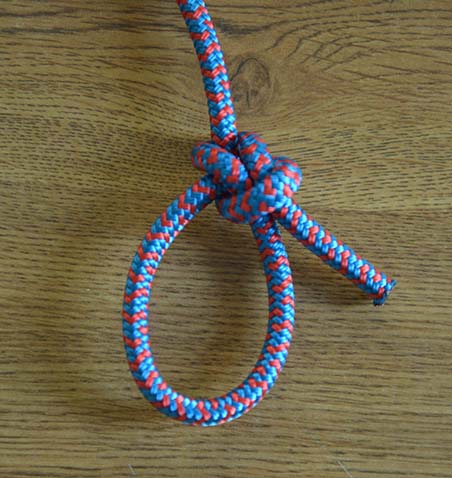 #5 - Next, dress up the knot and pull it tight to finish up, and you have a nice neat Bowline Knot.
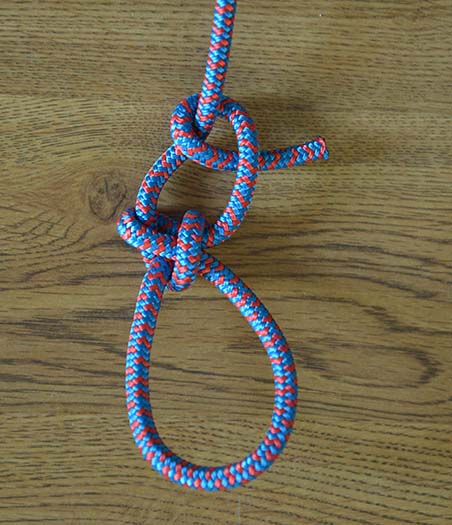 #6 Lastly, Some climbers will use a little more rope so they can take the loose end tie an extra knot on the main line to make the overall knot a bit more secure (above knot it reversed from the photo to the left).
Being able to climb back up the rope to the anchor would be very useful indeed. Mechanical ascenders can also be used for these types of self rescues, but a lightweight loop of rope is many times more practical than carrying the extra weight of ascender (not to mention the expense). Therefore, I believe it is very important for any climber who ventures into the wild to have a knowledge of how to tie a prusik knot. You never know when your life could depend on it. Below is a five part illustration of the "Prusik Knot."
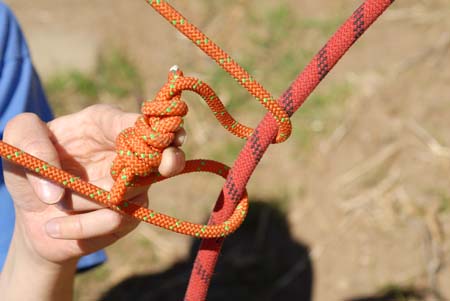 #1 - Create a loop using a lightweight determined length of rope. You need to make use of the "Fisherman Knot" as shown above to tie the ends together. Then begin to wind the loop around the main rope (in red) shown above.
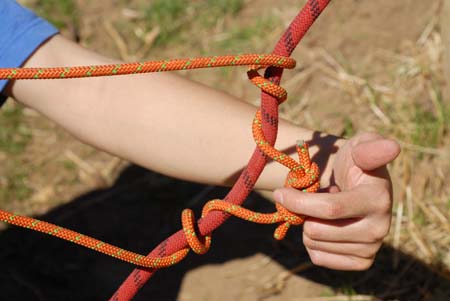
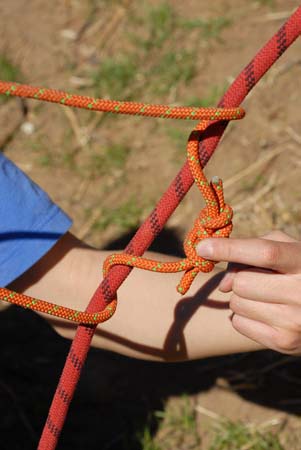 #2 - Next, continue to wrap the loop of rope around the main rope. The more the wraps, the more the friction. Two or three wraps should be enough.
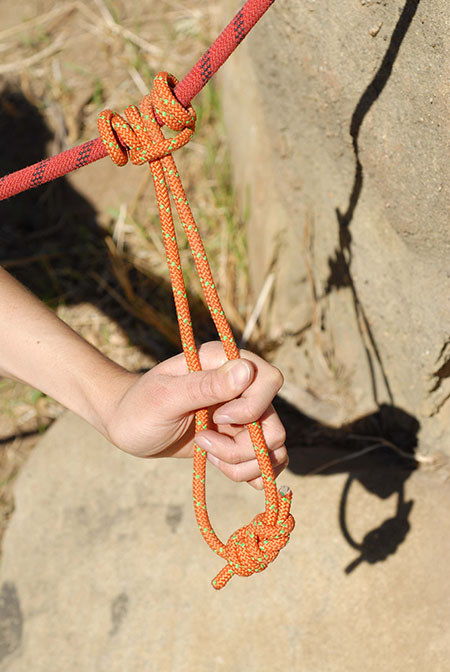
 #3 - The image above now shows the prusik knot nearly complete. From here all you need to do is pull the coil from the right, and tighten it up as shown in figure #4.
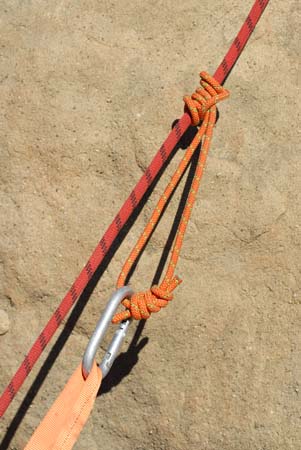
 #4 - Prusik knot completed as shown above.
#5 - Prusik knot in action.

| Join the Adventure! Sign up here for Timberline Trails Monthly Newsletter |

Join us on Instagram
©2006-2026 TimberlineTrails. All Rights Reserved.
....