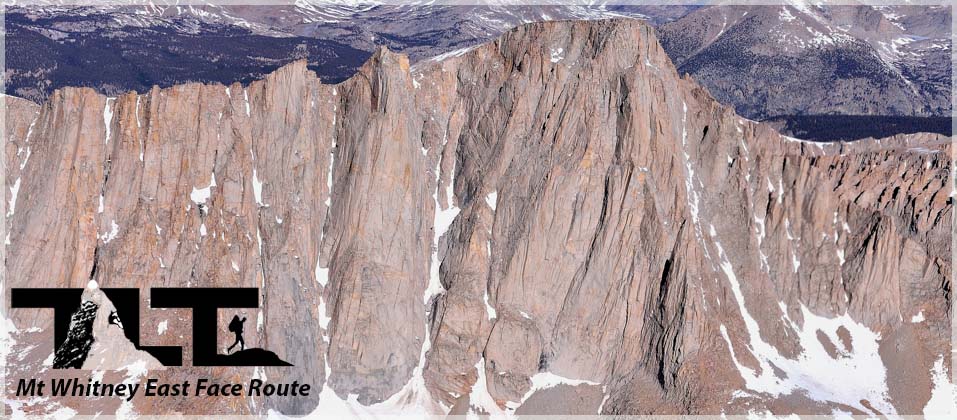
 Mt Whitney's East Face Route - is one of the classic big wall climbs in North America. It is listed in Steve Roper's and Allen Steck's well known book entitled "Fifty Classic Climbs of North America."
The East Face Route was first climbed by Robert Underhill, Francis Farquhar, Jules Eichorn, Glen Dawson, and the legendary Norman Clyde on August 16, 1931. Myself and my long time friend and climbing partner Mike Koerner made our first assent of Mt Whitney's East Face in the month of June 1981. It was an experience that neither of us will ever forget.
 Most access the East Face Route of Mt Whitney via the North Fork of Lone Pine Creek. This mostly cross country section to the East Face branches off the main Mt Whitney trail early on, and leads up a completely different canyon then the trail. High Camp for climbers is usually established at Iceberg Lake.
If you are interested in climbing the East Face Route, I would highly recommend picking up one of the many great books on the subject. The above mentioned book by Steve Roper and Allen Steck would be a great reference source. Their book and many others are loaded with important information about the climb, and they would be invaluable for anyone considering taking on the adventure. The photo in the above right hand side of the page is a photo that I took back in 1981 East Face climb as we approached Iceberg Lake.
 Now that we have the introduction behind us, lets get down to business. I have marked up the left hand aerial photograph that I took in May of 2013 to show you a "birds eye view" of the most important East Face climbing sections. Hopefully, this will enable you to get the "big picture" of what we will be discussing as we describe the key points of interest in more detail below.
As you can see, the East Face Route is marked out in green, and the Mountaineer's Route is marked out in red. The Mountaineer's Route is the more popular due to it being less difficult with a rating of class three, verses the East Face Route being class 5.4 (for more on ratings, see our page on Climbing). The Mountaineer's Route follows the prominent gully just to the right of the East Face Route. On this page, we will deal with the East Face Route (we intend on adding a page on the Mountaineer's Route on a later date). If you look close, the tower traverse is marked with a green dotted line. This is because that the actual climbing section is behind the tower shown in the image. Iceberg Lake, seen in the above image is where most East Face climbers set up there high camp for their climbs. The lake is usually frozen over during the spring months when most climbers visit the area. Those that do the Mountaineer's Route like to do it when there is still ice and snow in the gully. This way they can use their ice ax and crampons for a quicker ascent rather then climbing through loose rock and scree.

 Here we get a pretty good view of the lower section of the climb by blowing up the upper photo. The photo to the right gives us a view of the scramble up to the Tower Traverse in blue, then the actual "Tower Traverse" in orange, then the short scramble to the class three "Washboard Section."
I have added the above left hand photo for a different perspective in order to show the entrance to the Tower Traverse from below. When on the climb, the actual "Tower Traverse" is hidden from view from almost all sides until you walk a bit south to where a short catwalk opens up. The very narrow ledge known as the "Tower Traverse" (in orange) travels to the northwest across the south face of Tower Two. We took out a rope to protect the traverse, because it is very exposed and the handhold and footholds are small and rounded. I used a selection of a few small "climbing nuts" to protect the traverse. I would highly recommend a rope and protection here. Some have rated the traverse as 5.3 and a fall at this point would definitely be fatal.
Next, scramble a short distance (shown in yellow) to the start of the class three "Washboard" This section of the climb can go very quickly if you do not use a rope, but it is class three and many use a rope. We did, just to be safe, but some climbers go dropped due to the section being on the easier side of class three. If in any doubt at all, I would recommend using a rope for protection.

 Now for an up close and personal view of this section of the climb. The above left photo shows a good view of the Tower Traverse. As mentioned earlier, the traverse is very exposed, and a fall would send a climber 800 vertical feet to the rock hard ice below. You can also clearly see Tower One below when looking at the image. The entrance to the Tower Traverse is between the two towers (nothing to do with Lord of the Rings).
 You can see my foot in the lower right hand part of the photo as I belay my climbing partner Mike at the start of the Tower Traverse. He will remove the climbing protection as he travels across the face of Tower Two. Without the protection, a fall could create a pendulum effect and Mike could slam into one of the rock faces. Not something we wanted to risk.
In the upper right hand image, is a view of the "Washboard Section" of the climb. You can now look down and see the top of "Tower Two" that you traversed across earlier along with "Tower One" just below that. If you look closely you can see Mike clipping into the rope for protection on this class three part of the climb. Due to the excellent handhold and footholds it is possible to make quick work of this section of the climb. At the end of the Washboard, a short climb and traverse left (south) leads to a giant ledge where the climber is faced with his or her next decision. Do the 5.4 "Fresh Air Traverse" or the 5.8 "Shaky Leg Crack."

 This area is where you are faced with the crux of the climb. If you do the "Fresh Air Traverse" (as shown in the above photo), you will have chosen the 5.4 rated highly exposed option. The other option is the 5.8 rated "Shaky Leg Crack" We decided on the Shaky Leg Crack, which is about a 50 foot vertical crack that starts at the end of the alcove just above where the climber is standing in the foreground. But before we took on the Shaky Leg Crack, we were able to hang out for a while and watch the climbers in the photo above and to the right do the "Fresh Air Traverse." We met up with these two guys about mid afternoon. They were the only climbers we came across on route that day. Six or seven other climbers started out early that morning but ended up turning around at the tower traverse far below.
We were a little concerned for these two because the lead climber (as seen on the opposite wall) had not placed protection as of yet. A fall here (without proper protection) would have meant a nasty pendulum that would have slammed the lead climber into the wall just below his partner in the foreground. (We met up with them later, so they obviously made it without mishap thank goodness).
I read of a climber who died on the East Face right where these guys are and did just that, fell and did a pendulum into the rock face where his belayer was. He hit so hard that he passed out and died from internal injuries. Fortunately these guys made it without a problem, but the moral of the story is you always need to place protection to avoid these types of disasters.

 Pulling back a bit to a "birds eye view" again, you can see the "Fresh Air Traverse" section in the left hand image, and and "Grand Staircase" section in the right hand photo.
What makes the Fresh Air Traverse the crux of the climb is the exposure. Being roped up along with the careful placement of protection is very important when it comes to safety. I know there are climbers out there that easily climb something like the Mt Whitney East Face Route solo and with no protection at all, but I'm certainly not one of them, and I would not recommend it to anyone. But each has to make there own decision when it comes to safety. I always say error on the safe side. We took the Shaky Leg Crack variation, because the climbers were occupying that section when we got there, and also because it was less exposed even though it is rated as technically more difficult. Once you finish the Fresh Air Traverse, or exit the Shaky Leg Crack variation, you will be able to quickly make time until you get to the "Grand Staircase."
The Grand Staircase is nothing more than a series of large block boulder problems that we did not find too difficult. You can see the nature of these large blocks if you look closely in the upper right hand photo. They are the last obstacle before reaching the summit. When we finished up, we came out face to face with the Mt Whitney summit hut. Very cool!! We finished late in the day and ended up spending a very cold and long night in the summit hut. The weather was completely clear, so we were not too worried about lightning. As mentioned on our Trail Camp page, the hut offers no protection against lightning and the summit and high ridges need to be vacated right away if lightning is a possibility. Early in the morning, we went back to our camp at Iceberg Lake via the North Slope. Most climbers, however, take the Mountaineer's Route as there decent path.
 Well, that's about it for the East Face Route up Mt Whitney. There are many other fine climbs in the area, and if you are an expert climber, there are routes not only on Whitney's East Face, but there are extremely challenging routes on the needles just to the south of Mt Whitney. The East Face of Mt Whitney is certainly one of the classic climbs in North America and there are multitudes of established routes, but the East Face Route is arguably the most famous, and as mentioned above, my climbing partner Mike and I will never forget it!
BACK TO TOP
Email Sign Up

| Join the Adventure! Sign up here for Timberline Trails Monthly Newsletter |

Join us on Instagram
©2006-2026 TimberlineTrails. All Rights Reserved.
....